Its been a busy last few months, been working at Street Characters Inc. building mascots. Spent my evenings working on a wooden drawing machine (should upload some photos of that...) and yet another boat for my fleet. This ones a canoe, and I am working to keep it under 15 pounds so I can carry it into backcountry mountain lakes. The complete frame is to the right, it came out at around 10 pounds (4.5 kg). Which is not bad for an 11' boat
Its been a fun boat to build, to keep the weight down I had to use the clearest straight red cedar I could find. The stems and centre thwart are red cedar, and the ribs are local ash wood I got from Drew Beatie, who runs a portable bandsaw-mill.
For those wondering how you build something like this, read on.
 This is all the cedar stock, I start by running it through my bandsaw to rip it down to size. I dont have a jointer or a thickness planer so I hand plane all the pieces down smooth. I also dont have a carpenters bench so I use a 2x6 stuck in a workmate and resting on a saw horse for a planing bench. It works great.

This is the creation of the stem pieces (the curved bits at the bow and stern of a canoe) They need to be really strong as they are what you tend to run into things with. I took a piece of yellow cedar, roughly 2.5x3cm and ripped it into thirds. The pieces were then steamed, and bent over a form together.

They hold their shape pretty well once steamed.

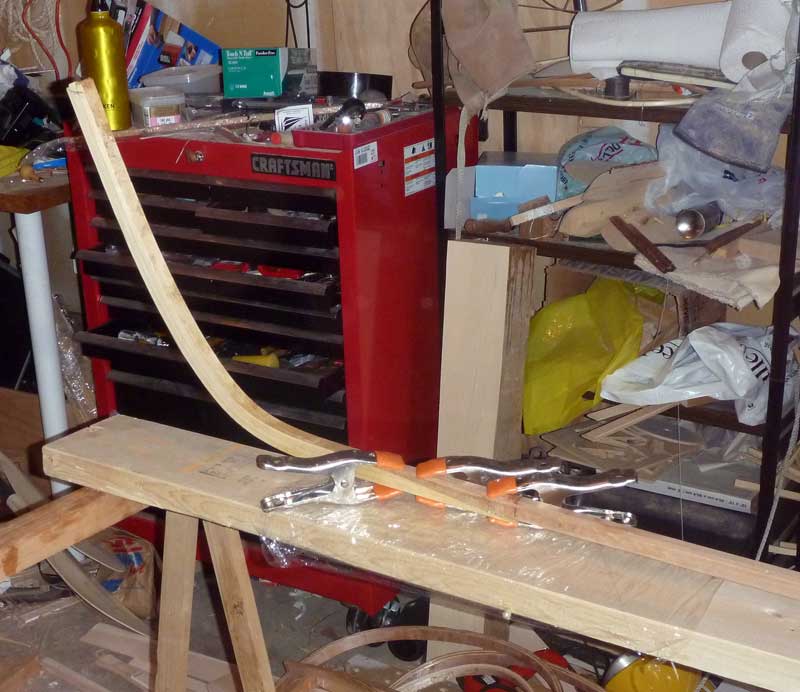
I then glued them together with PL Premium construction adhesive. Use a lot of clamps.

The end then gets scarfed into the keel stringer. Most sane people use a table saw to do this. I don't trust mine, so I use a sliding miter saw. Cut a piece of scrap at 45 degrees, and clamp your piece to that. With a bit of futzing on the set up you can get a really accurate 8:1 scarf cut. Just be advised the the offcuts will launch, fortunately away from you.

Installing the stems onto the keel stringer. It would probably be wise to drill a couple dowels to keep the two parts from sliding while you glue them. Learning is fun.

These pieces are the breasthooks for the bow and stern. They attach the ends of the gunwales to the stems. To make them use a sliding bevel gauge to eyeball the angle that the gunwales meet the stem at, average all your measurements and take your best guess and set the miter saw to that.

I tape them up so I dont have to clean off the glue, and then just glue and peg them in place.

This is how you rip long stock in a very small and messy shop. I set up my bandsaw in the middle of the garage so then I can use my miter saw stand as an out-feed. It works better than those roller stands as you cant tip a mitersaw stand over easily. Here I am ripping thin stock off a big hunk of green ash for the ribs.

Once ripped, its back to planing, by hand. Someone finally told me to stick a block of wood at the end of the bench for the piece being planed to rest against. Previously I was clamping the wood down. The block of wood makes life so much easier.

Here is the hull blocked up with temporary ribs. These were left over from a previous experiment at making gluelam ribs. I learned that if you overclamp epoxied joints you squeeze all the glue out. Resulting in a useless rib for a functioning boat, but it works great as a form.

The ribs were steamed and shoved in next to the temporary frame. This was my first experience steaming green wood, and hallelujah I have seen the light. After 15 minutes in the steamer you can pull these out and bend them into a 3 inch radius with no problems at all. And this is 3/8" thick ash wood.

The hardest part of building this boat was working out all the little details, so here is a few shots showing some of the more tricky bits and how I worked them out.
First, this is where the stringers meet the stems. I cut them off at an angle to match the surface. Then tied a couple constrictor knots around the stringers. These keep the lashing from sliding off the front, I then wrapped around both stringers, made a couple frapping turns to secure it, then did a couple loops around the stems.

This is the mini thwart at the bow and stern. I added this piece in because I felt the boat needed a little more wood to keep the gunwales from spreading. Its a simple Y lashing through a hole drilled in the thwart. You can see how the inwale and outwale are also secured with a lashing to hold them together.

The centre thwart is lashed in much the same way. I added in a block of ash between the thwart and gunwale to help spread the load, red cedar is really soft wood. This joint isn't pegged or glued, the lashing holds it in place just fine.

Shot of the final stem piece. The breasthook is glued to the gunwales, but only lashed to the stem. I wasnt sure what to do with the inwales so I just cut them off and lashed them to the outwale.

Stem from a profile view, you can see the scarf joint on the keel stringer. I should probably put a couple lashings on it to secure it.
The

complete frame.

For you detail nuts, the dimensions of all the pieces are as follows: (all units cm)
Gunwales: inwale: 1.1 X 4 outwale:1.3 x 4
Stringers: 1.5 x 1.7
Keel stringer: 2.3 x 2
Floorboards: 4 x 0.9
Ribs: 2.6 x 0.9
Stems:2.4 x 2.2
Centre thwart: 3.3 x 2.2 in the centre tapering to 3 x 1.7 at the ends.
End thwarts: 1.1 x 1.77
The overall proportions of the boat are 11' long and 28" wide, its 13" deep amidships and is slightly wider aft of centre.